Get Started
Prerequisites
Before you begin using the AI Function Builder, it's essential to understand who can benefit from this platform and what requirements are needed for deployment.
Who Can Use AI Function Builder
- Developers: If you're a developer building AI-powered products or integrating AI functions into applications, the AI Function Builder provides tools to streamline your workflow and enhance your projects with advanced AI capabilities.
- Data Scientists: For data scientists focused on processing and analyzing data, AI functions can offer insightful data analyses and automate complex tasks, making data handling more efficient.
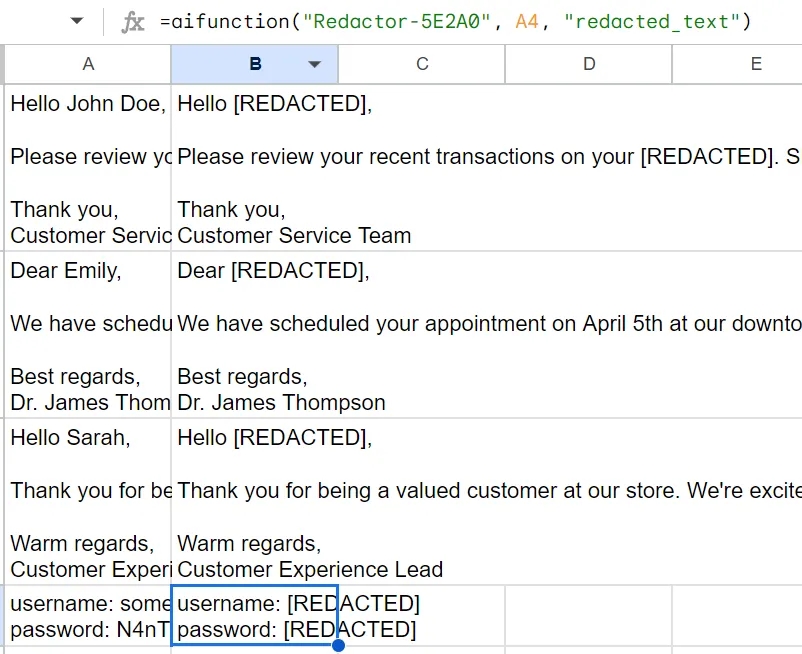
- Non-Technical Users: Even if you don't have a technical background, you can utilize AI functions for data processing through user-friendly tools like Google Sheets, expanding your ability to work with AI-driven data analysis.
Requirements for Deployment
To deploy and use the AI functions you create, ensure you have one of the following setups:
- Python: Install the Weco AI Python client to integrate AI functions into your Python applications or scripts.
- Google Sheets Add-on: Use the AI Function Builder add-on within Google Sheets to apply AI functions directly in your spreadsheets without any coding.
- RESTful API: Regardless of your programming language or platform, you can call the functions you create via a RESTful API, allowing for broad integration possibilities.
Quick Start Guide
Follow these step-by-step instructions to create, test, and deploy your first AI Function. This guide will help you navigate the AI Function Builder interface and get your function up and running quickly.
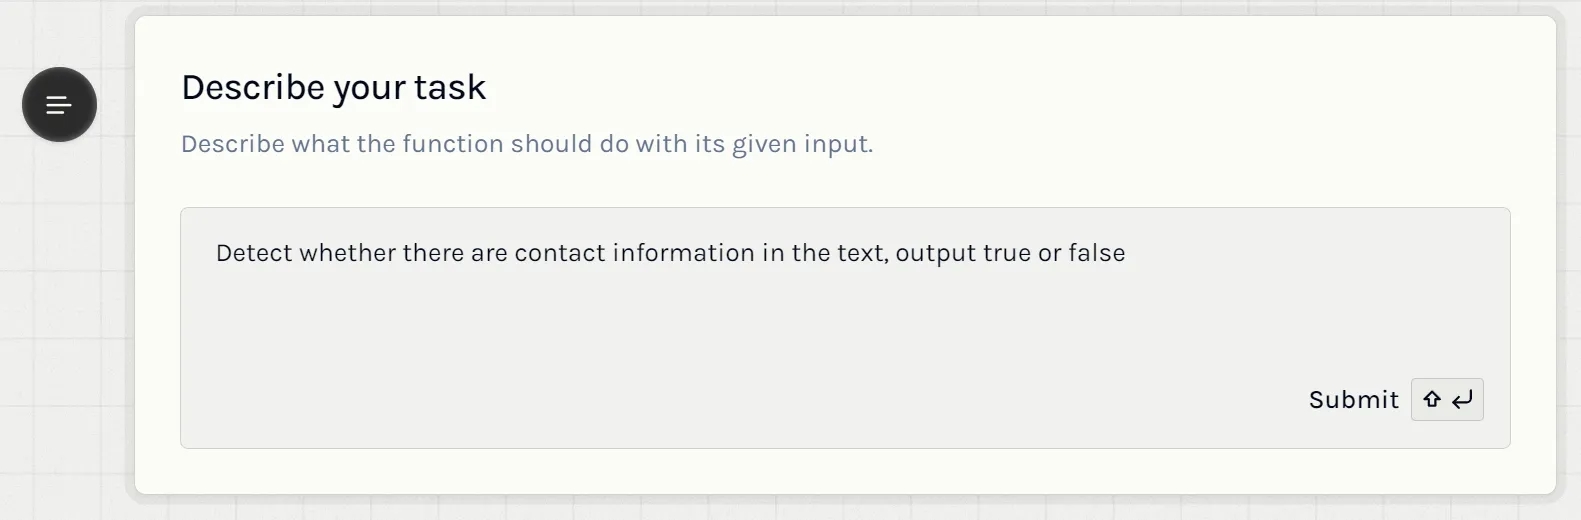
1. Describe the Task
Provide a clear and concise description of the task your AI function should perform. Focus on detailing the desired input and the expected output.
- If you have specific requirements such as cost constraints, latency considerations, or performance expectations, mention them in your description to guide the AI Function Builder in tailoring the function to your needs.
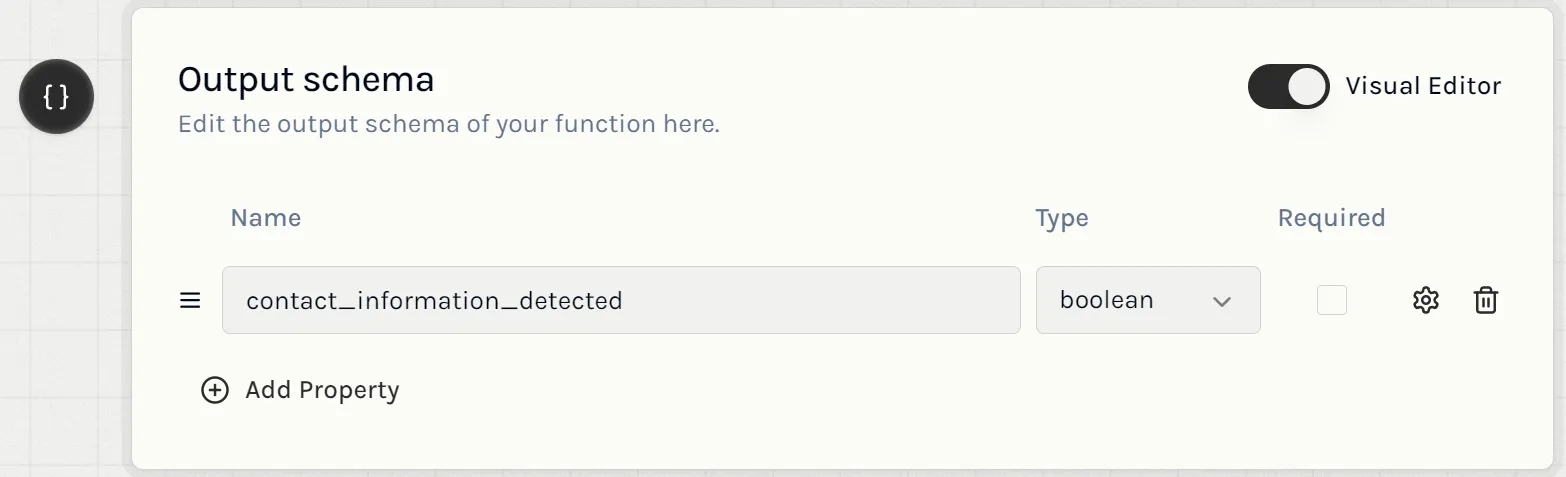
2. Review and Customize the Output Schema
After describing your task, the AI Function Builder will automatically generate an output schema. This schema specifies all the output fields and their data types, defining the structure of the data your function will return.
- Examine the output schema carefully to ensure it aligns with your intentions and accurately reflects the desired output format.
- If necessary, you can edit the schema directly in the web interface to add, remove, or modify fields according to your requirements.
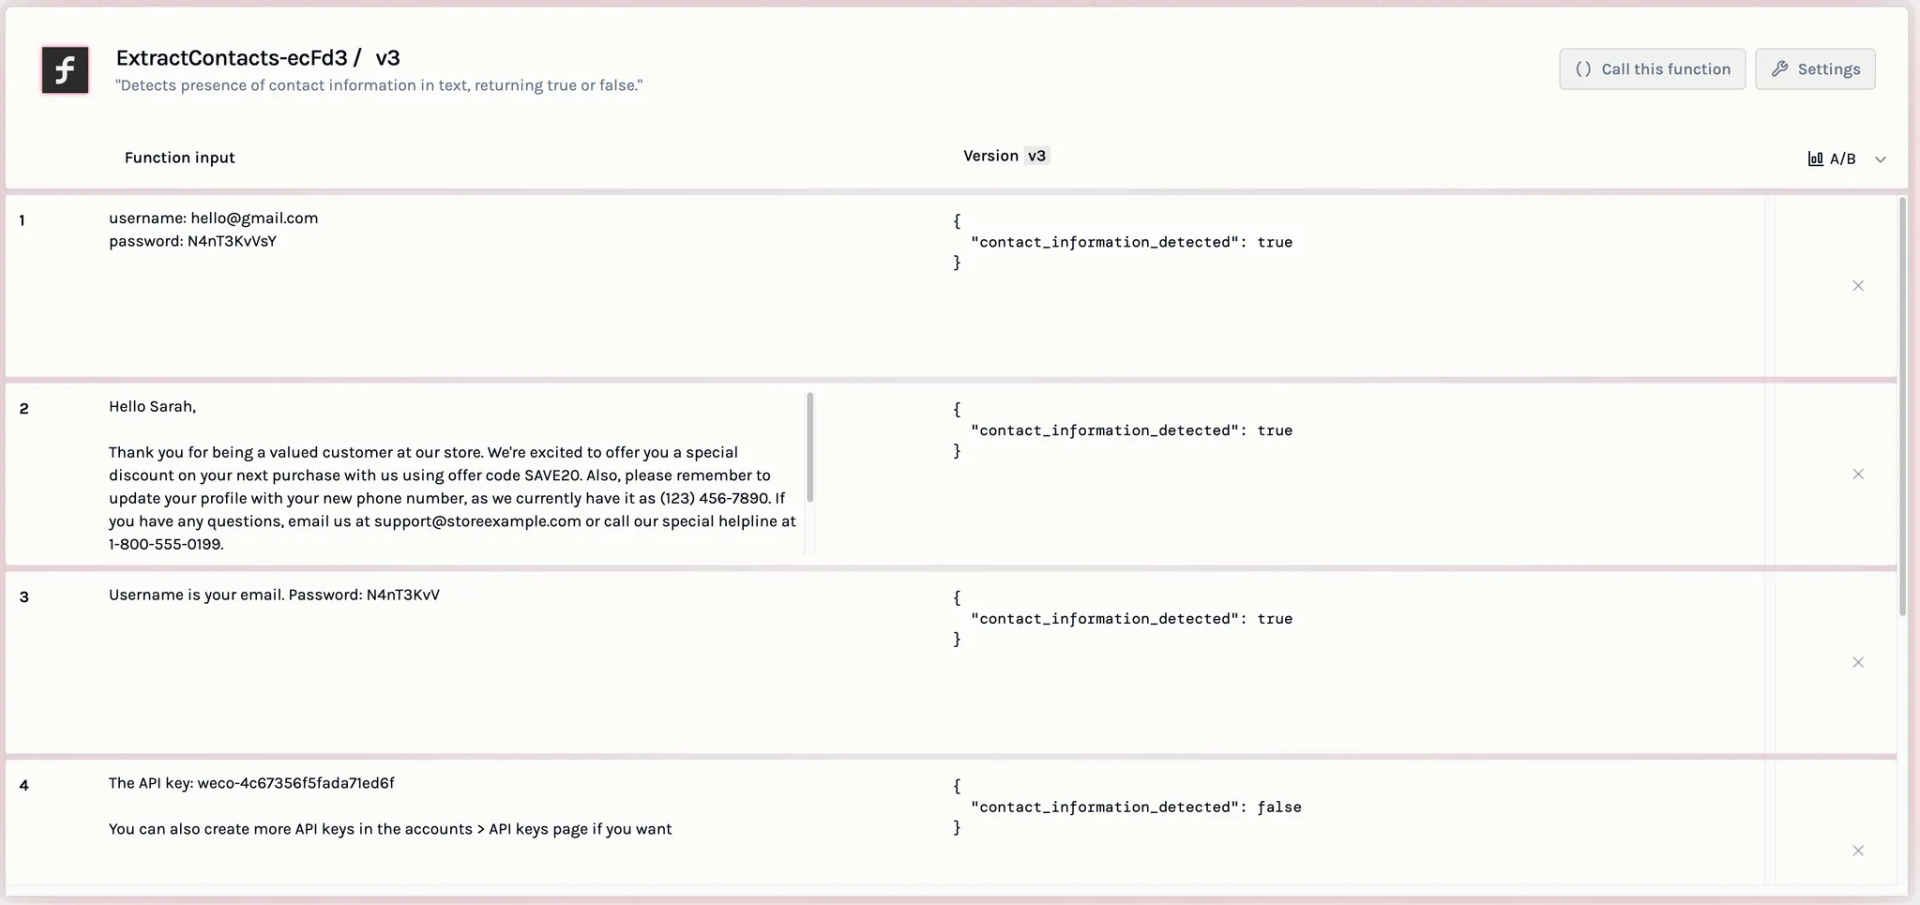
3. Test the Function
Before deploying your function, it's important to test it to ensure it works as expected.
- Input your own test data: Enter sample inputs that your function will process to see how it performs.
- Or, click the icon in the top-right corner to generate a synthetic input example, which the AI Function Builder provides to help you test the function.
- Observe the outputs generated by your function and verify that they meet your expectations. If needed, adjust your task description or output schema and retest until you're satisfied with the results.
4. Deploy and Use the Function
Once you've tested your function and confirmed it operates correctly, you're ready to deploy it. The AI Function Builder offers several deployment options to integrate your function into your projects:
- Python Integration: Use the Weco AI Python client to deploy your function with a single line of code. This is ideal for integrating into Python applications or scripts.
- RESTful API: Call your function via a RESTful API endpoint, which allows you to use the function from any programming language or platform that can make HTTP requests.
Google Sheets Add-on: Utilize the AI Function Builder add-on within Google Sheets to apply your function directly in a spreadsheet. This option is perfect for non-technical users or for quickly processing data without writing code.